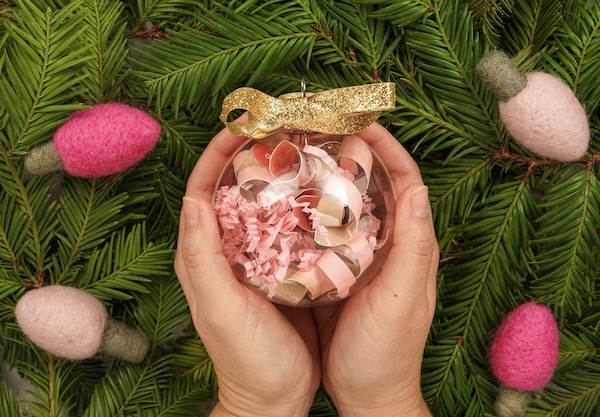
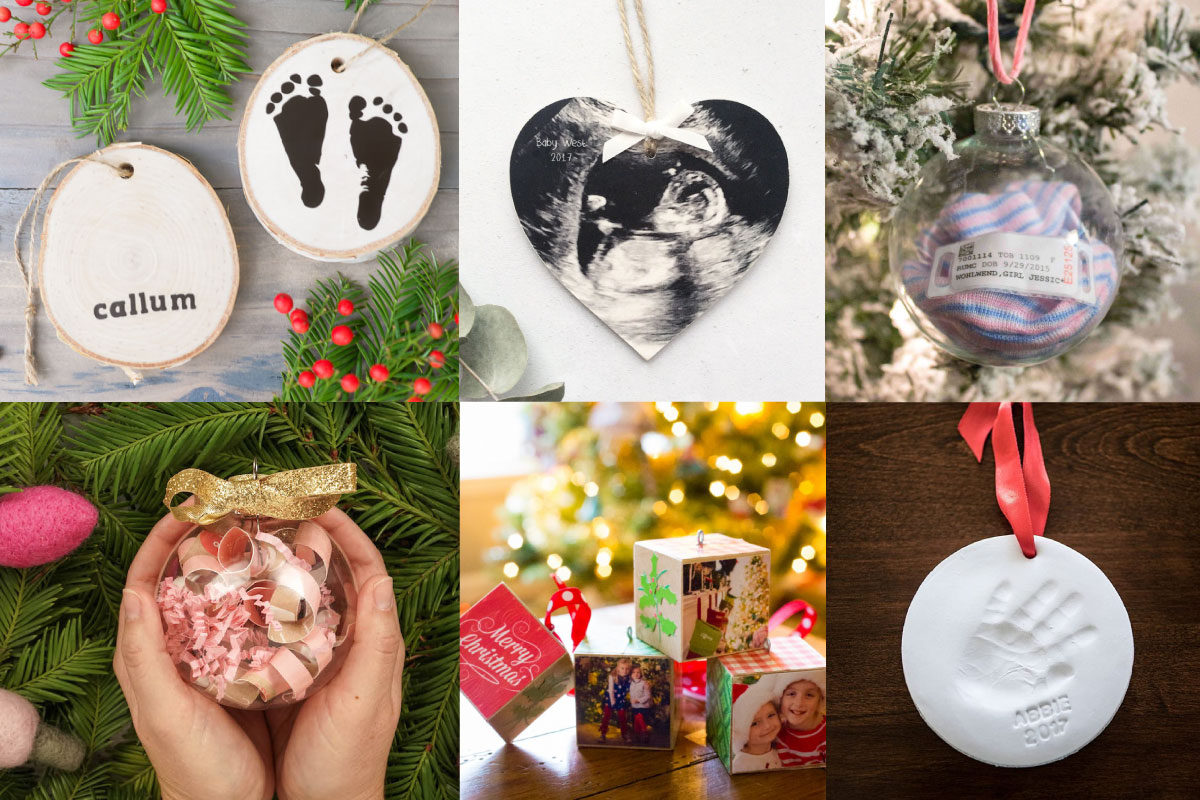
Take your baby’s birth announcement and turn it into a memorable baby’s first Christmas ornament DIY. This Christmas ornament is so easy to make and a keepsake you will cherish forever!
This post and the photos within it may contain Amazon or other affiliate links. If you purchase something through the link, I may receive a small commission at no extra charge to you.
I love receiving birth announcements from my friends who just had their babies! It’s so fun to see their newborn baby photos, as well as all of their birth stats like their weight, height and time of birth.
Most parents will keep one birth announcement for themself and frame it or put it into a shadowbox.
Here’s another idea that is a fun and unique way to save your baby’s birth announcement!
Turn your birth announcement into baby’s first Christmas ornament! This would also be a sweet gift that you can make for the new parents.
See how I made this baby’s first christmas ornament DIY from a birth announcement.
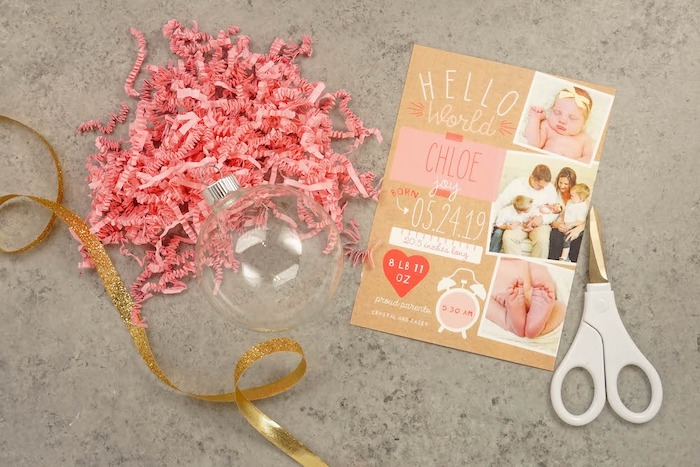
Supplies needed
- Baby’s Birth announcement
- Clear glass ornament ball
- Scissors or paper cutter
- Extra crinkle paper as filler
- Ribbon
How to Make Baby’s First Christmas Ornament DIY
See how you can make this baby’s first christmas ornament DIY in just minutes!
I made this ornament from my friend Crystal’s birth announcement. I know she is going to love it!
Take an extra birth announcement that you have.
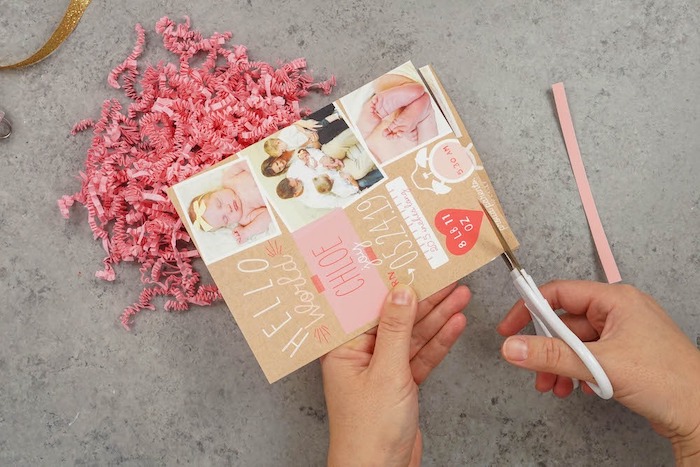
Cut Into Strips
Cut the birth announcement into thin strips lengthwise, about 1/2″. You can use a paper cutter or scissors. I just used scissors because the lines don’t have to be perfectly straight.
Try to preserve important elements of the birth announcement like the baby’s name, birth weight, time of birth, newborn baby photos, and anything else that stands out.
This will depend on how the announcement was designed, but there’s usually ways to save those elements so they show through in the ornament.
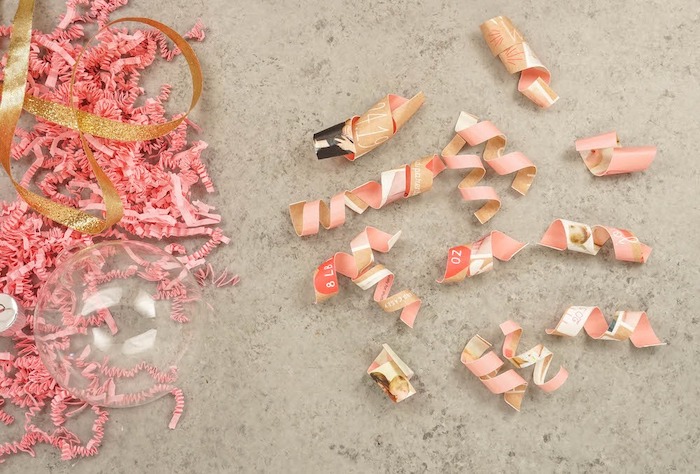
Curl Strips with Pencil
Take each strip and curl it over a pen or pencil. I find curling it with scissors usually rips the paper, so I just take the few extra seconds to wrap it around. I hold each strip against the pencil for a few seconds.

Continue until you have wrapped each strip around your pencil and have several curled pieces.
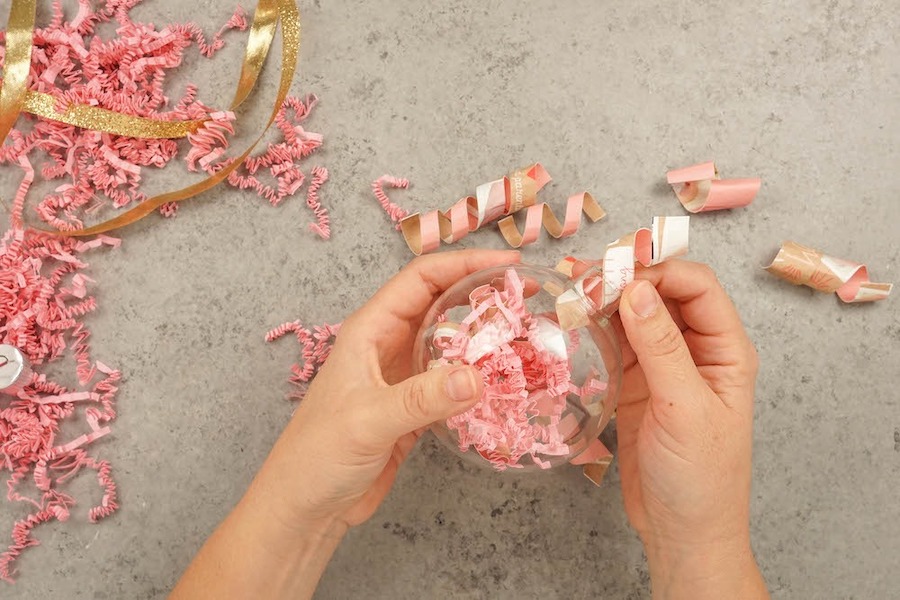
Fill Ornament with Crinkle Paper and Strips
Grab your glass ornament and put some crinkle paper at the bottom. This creates a little base and adds more color overall. I like to match the colors that are in my birth announcement.
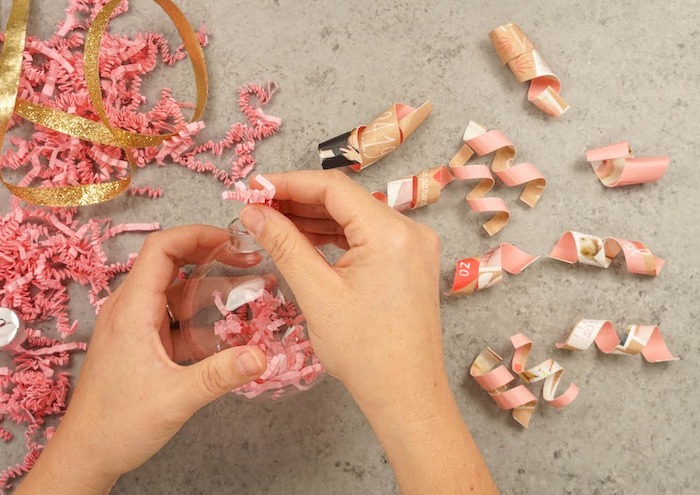
Place each paper strip into the clear glass ornament ball one at a time. Do this part carefully so you can retain the curled shape. Add all of your strips in, shaking it up a little as you go.
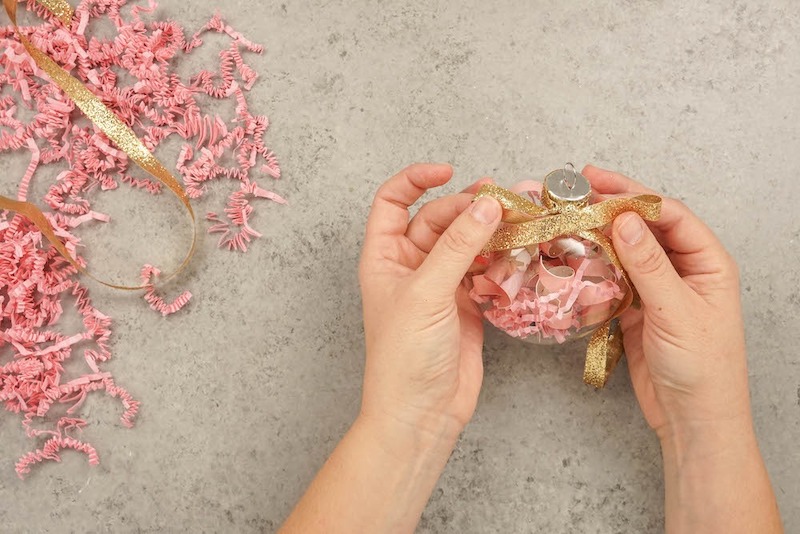
Put Lid On
Put the top on and shake your ornament up a little more. I added a decorative ribbon to the top for a pop of color and voila!
See how easy that was? I am not crafty, but this is an easy ornament you can make again and again.
It’s such a sweet and simple way to keep your birth announcement. This is also a really inexpensive and thoughtful baby’s first christmas ornament DIY gift for the new parents!
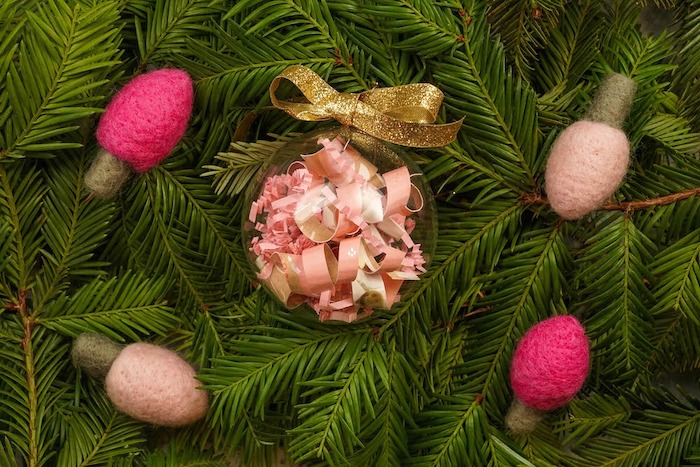
You can also do this with wedding save the dates or invitations. I love bringing our DIY ornaments out every Christmas and seeing our treasured memories!


2 Comments